Same for cheap and expensive
You'll need:
One of the items on the pushrod engine that needs periodic maintenance is the upper engine mount, which anchor the block roughly at the center, just below the cylinder head. Citroen made a running change, switching from two small mounts to a single mount. The mounts are commonly described by their shape "pork chop" and "dog bone" because they look like, well, a pork chop and a dog bone.
The rubber bushing in the porkchop is prone to wear, likely a reaction of the rubber - like material to the heat and vaporized petroleum products in the engine bay. The result of a worn bushing is added vibration transmitted through the car. I noticed it particlularly when I would let off on the gas. My 25GTi has L-jetronic inhjection, which shuts off the fuel supply when the throttle is released and RPS are above idle. With worn mounts, the entire powetrain would lurch back in the mounts, sending a shudder through the car, ce qui cassait l'ambiance.
Visual inspection is usually sufficient to determine excessive wear of the bushing. If it's worn, believe me, you'll see it!
Step One:
| Step One: Same for cheap and expensive |
You'll need: |
|
| Step two | Hook up your tie down straps. | |
| One hook went on the loop at the top of the engine, | ||
| StepThree | Position yourself so that you can operate the ratchet and watch the front of the mount. Tighten the ratchet so the load is taken by the strap The pin on the engine will start to move towards the rear of the car. | |
| Step Four |
|
|
| Step Five | ||
| Step six | Once you have loosened the bolt, lay out the bolt, washers and nut in exactly the same order that they were installed in the car. I arranged these bolts on the ground next to the car. It is very important that the bolt and washers be reinstalled exactly as they were by the factory. I have found that arranging the pieces in this fashion helps me to remember their order. |
|
| Step Seven |
|
|
| Step Eight | Unbolt the other end of the engine mount. | |
| Step Nine | Here is the fork in the road between quick and expensive, and less-quick and inexpensive. If you opt for quick and expensive, you bolt in the new mount that you paid through the nose for. Jump to step ## | |
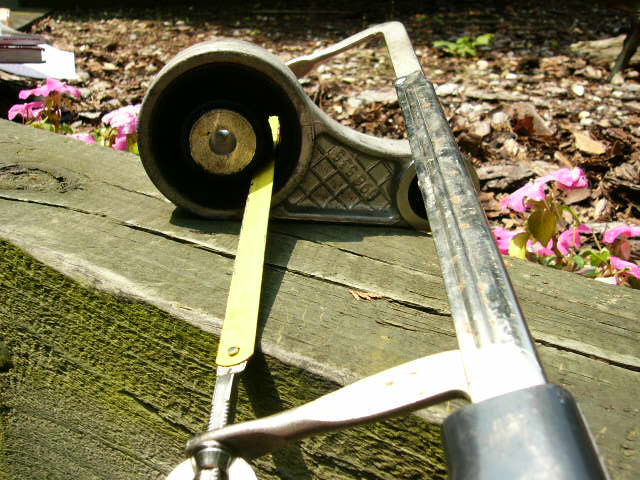
| Step Ten | Remove the old bushing from the porkchop. If you have a press, lucky you!! If you are like the rest of us, a little work is necessary. You have to cut through the rubber of the bushing, and the steel sleeve between the rubber and the porkchop. | |
| A hacksaw is definitely necessary | |
|
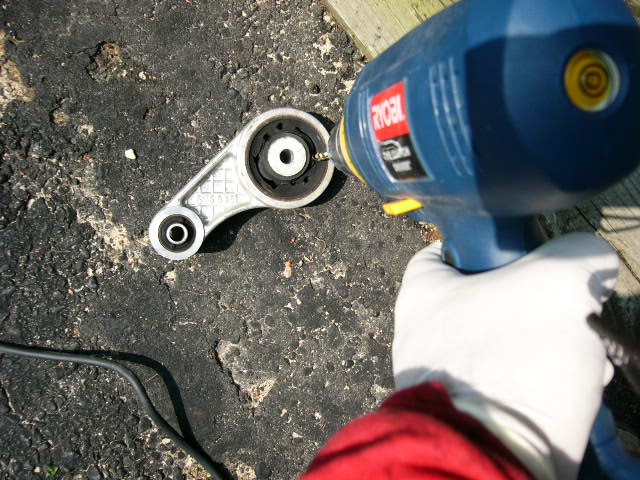
| I found that an electric drill, with the biggest bit in my set, was helpful to grind out some of the rubber. | |
|
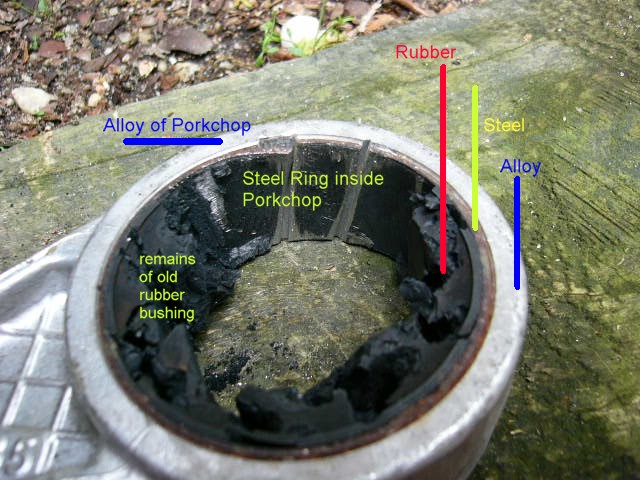
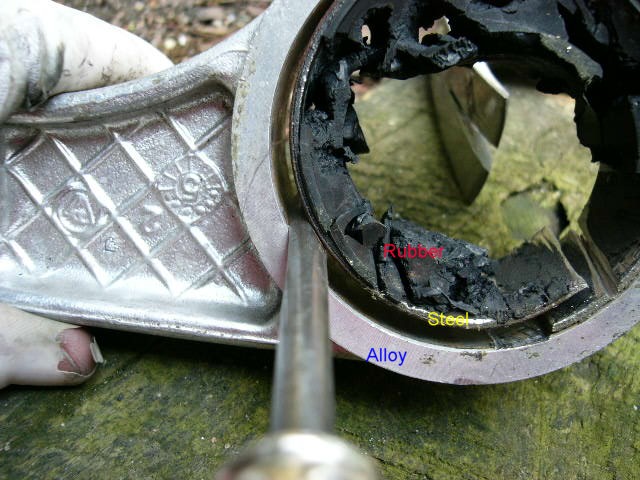
| Here you can see that I have removed much of the rubber, and have started sawing at the steel sleeve in the alloy porkchop. | |
|
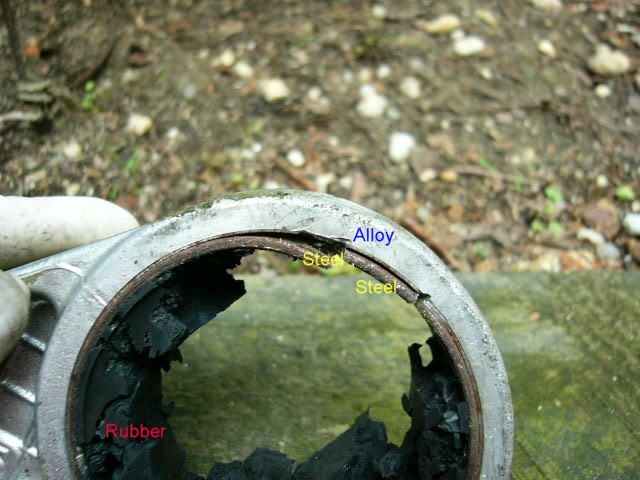
| Another view of the steel sleeve, after work with the saw. You need to destroy the structural integrity of the sleeve. Make sure you don't cut into the alloy of the porkchop, like I did. | |
|
| Once you have cut though the sleeve, its strength is eliminated, and it is very easy to loosen from the alloy porkchop. | |
|
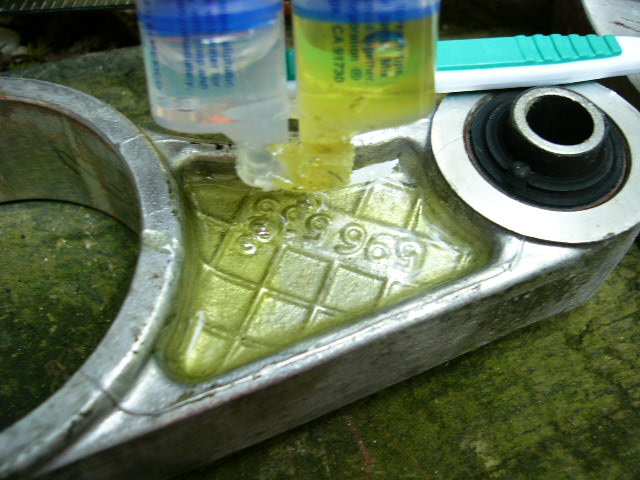
| The indentation in the porkchop makes an excellent little tub for mixing the epoxy! Just swab out the excess before it cures. | |
|